Tuesday, June 30, 2015

Food and Family!

My kids are all grown and on their own now. But I like that they call to talk or send me texts and pictures of the grandkids everyday. But what I enjoy even more is when they all get to come and visit from whatever part of the country that they are working in at the time. 

This past week they were all home and we enjoyed being together for laughter and food. One night we had catfish, fried potatoes and coleslaw. So simple, and yet so tasty and enjoyed by all. 


FISH COATING
3 cups white cornmeal mix
1 Tablespoon garlic powder
1 Tablespoon salt
1 teaspoon ground black pepper
1 teaspoon paprika

Mix the ingredients well. Roll fish fillets in the coating and place in hot grease in your deep fryer and cook till golden brown. 

This recipe coated about 6 pounds of catfish fillets.


The fried potatoes were delicious and enjoyed by all. I used the yukon gold potatoes. Washed then cut them into bite sized pieces with skins on. Placed in a large skillet with hot oil in the bottom of it and added a chopped up yellow onion and a cleaned and chopped green bell pepper. Add salt and pepper, place lid on skillet. Cook over medium heat, turning potatoes occasionally to prevent sticking and burning. Cook till potatoes are tender. Place in colander to drain the grease...then enjoy!

Sunday, June 28, 2015

Scripture Sunday

She opens her hand to the poor, yes
she reaches out her filled hands to the 
needy (whether in body, mind, or spirit).
Proverbs 31:20 AMP


A woman who walks with the Lord all her days
is a beautiful sight to see!


Wednesday, June 24, 2015

Mini Charm Table Runner

I made this quick little table runner using a couple of mini charm packs that I had in my stash.  I really
enjoy the fun spring colors.


First I matched the little 2-1/2" x 2-1/2" charms into pairs to make a 2 patch unit.


Then chain piece them together, using a 1/4 inch seam allowance.  Clip the pairs apart, and press the seams.


Next, sew 2 pairs together, end to end to make a 4 patch unit.

Then add a 2 block unit to a 4 block unit, end to end, to make a 6 block unit.  


This is a good project to use the chain piecing technique.


Each 6 charm unit is one row. 
Make 14 rows.


Arrange the rows till your pleased with the placement.


Sew the rows together.


Quilt as desired.
I used this quick and easy little squiggly line to quilt my 
table runner. 


I used this little floral print fabric from my stash for the backing.  The wiggly quilting lines really showed up nicely on the back. 

My husband pointed out that this little table runner could be reversible.  

My husband really knows how to encourage me!
Every woman should be so blessed to have a husband like mine!

Linking up with:


Monday, June 22, 2015

Works in Progress...

While reorganizing my sewing room...or my fabric pantry, as my husband calls it... I kept pulling out a lot of flimsies and other UFO's.

I decided to make a list and I wrote down what still needed to be done to these items to take them from the works in progress status to the "Finished!" status.


Wow!!! I need to stop starting new projects and get busy finishing!

I've noticed that I seem to do better, complete more projects when they are listed on my to do list. But if not on my list and stuck in a drawer or closet...they become out of sight, out of mind.

I hate resolutions...I do like a challenge though.
So, I think I shall challenge myself to finish these UFO's or WIP list before the end of this year. I guess this will be my 2015 Challenge.

Now...just to figure out where to start!

How do you keep your UFO/WIP list manageable?

Sunday, June 21, 2015

Happy Father's Day!
Happy Father's Day to my dad, my husband and to all the  men out there who have taken the time to mentor and be the role model for the young people in your life. For the wisdom, instruction and encouragement. Thank you!


Get all the advice and instruction you can, 
so you will be wise the rest of your life.
Proverbs 19:20

Friday, June 19, 2015

Needle Cushion Tutorial

Have you ever needed to switch to a different thread and needed to use a different size needle for that thread? But you don't want to put that good used needle in with the new needles in the package?

How do you keep track of the different sizes after they come out of the package?

A friend of mine had a tomato pin cushion that she wrote the different sizes of her needles in each section using a sharpie.  When she has to change needles, she just places the good used one in the correct section of the tomato.

I didn't have a tomato pin cushion, so I decided to make my own needle cushion with some fabric scraps.


I had these little dresden plate wedges left over from another project.

I sewed them into pairs using a 1/4 inch seam allowance. I pressed the seams toward the darker fabric.


Then I sewed the pairs together. Then again pressed the seam.


I had this yellow print in my stash. I cut a 3 x 5 inch piece for the backing for my needle cushion.


Then with the top and back laying right sides together, sew a 1/4 inch seam allowance using the pieced top as my guide. I left one end open.  Then trimmed the backing to be even with the top after I stitched around the top.

Turn the cushion right side out...I used my purple thang to push the corners out.
Using my micron pen, I wrote the needle sizes that I use the most in different sections.


Then I stuffed the cushion with some left-over batting. Turned the opening under and pinned. Then I stitched the opening closed by hand.


This is a picture of my finished needle cushion with a couple of good used needles in it.

How do you keep your needles separate when having to switch needle and thread during a project?


Linking up with:

Quilting is more fun than Housework

Wednesday, June 17, 2015

A Use for Old Sewing Machine Needles

Wow! Have you ever noticed how nice and smooth your sewing machine runs after you've placed a new needle in it?

A good rule of thumb is to change the needle when you start a new project...Of course, I'm bad about working on several projects at a time.

For those who use there machines for long periods of time, you may find you need to change the needle every day or after every 8-10 hours of sewing...more
often if you happen to hit a pin while sewing. 

I know...I know...I'm not supposed to sew over the pins!

I notice that my machine will start making a little popping sound when the needle starts getting dull. When I start noticing that sound, I try to take a break in my sewing and make time to change the needle.

If I have to change the needle because it has gotten dull and not because I bent the needle, I also take the time to clean the lint out of the machine then too.

The machine just seems to run so much smoother then.

So what do you do with those old used needles? 

I have an old medicine bottle that I save all of my old needles in. I'd hate for someone to get stuck with one if I just threw it in the trash.


A Use for Dull Needles


I have been teaching my little granddaughters the basics of using a sewing machine.

I put one of the dull needles in my machine, then using some of there old school papers, I let them practice sewing on the lines (without thread).

I'm dulling my good needles by sewing through the paper, and they are learning to control the speed of the machine and learning to sew 1/4 inch seams using the lines of the paper.

The girls are having a blast learning to use the sewing machine!

It's a good thing I have a back-up!

What other uses have you found for your old needles?

Monday, June 15, 2015

Sewing Space...

This week I've been re-organizing my sewing room. It had gotten in such a mess. I would pull fabric for this project and that...not put it back...and soon it was in a mess. 

My sewing room...since I've had one only a short time..has become a place where I can go and think, plan and create. A place to go and just...reboot.

When I fixed up my little sewing studio from a spare bedroom, I first decided where best to place my sewing station.


Then organized my fabrics, thread, patterns, etc around that.


But above all else, I wanted my space to be warm and inviting. To encourage relaxation and creativity.

I have an easy chair where I can sit and write, read or just work on some hand work, or for company  to sit and visit.


I made curtains to make my room look loved.

(please forgive the picture quality)

Signs of encouragement.


And entertainment when I need a little break!


My sewing studio..or my fabric pantry (as my husband calls it) has become so inviting that it is one of the first places my grandkids run to when they come to visit. It's where they want to play...and where they want to sleep at night.

When I'm in there sewing my husband likes to sit with me and read. And when I'm not home, he still will go and sit in there. He said it makes him feel closer to me. 

My sewing room is cozy, warm and inviting. It not only is a place for me to be creative, but also a space for my family to find peace.

My family says that "this is mom's sewing room"...
but they all know that they are welcome.

Is your sewing space shared with the whole family...or is it still your space?

Sunday, June 14, 2015

Sunday Scripture


Pleasant words are a honeycomb,
sweet to the soul and healing to the
bones. Proverbs 16:24


Friday, June 12, 2015

Works in Progress!

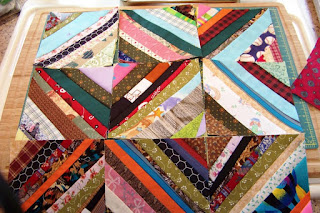
I have continued to work on some scrappy string blocks this week. These are a few more that I finished up. 


I'm still not seeing a dent in my scrap bucket though!


I did receive my Farm Girl Vintage book by Lori Holt of Bee in my Bonnet! If you don't have one, I encourage you to get your copy. I love it!


I did get my first block from her book done this week. This is my Apron Strings Block!

I also made some of the little design boards that Lori has a tutorial for on her blog. I used some left-over binding to put around my design boards. They are very handy!

I would love to here what you have been working on this week!

Wednesday, June 10, 2015

Spring Fling Table Topper

I've been busy making some string blocks from my scrapbag the last several weeks. So, I thought I would make a little table topper.


I just picked out nine of the blocks and layed them out in a 3x3 lay-out. My blocks are 5 3/4 inch square, unfinished.


I sewed the blocks together with a 1/4 inch seam allowance, then pressed the seams open.


This red print is a flannel piece that I picked up at a resale shop when my daughter and I were out one day. 


I cut this piece in an 18 inch square.


I then layered the top and bottom fabric, wrong sides together. I chose not to add batting. My daughter didn't want the topper to be too thick. I then quilted it by following the seam lines with one of the decorative stitches on my machine. 


I then folded the backing over the edge to bind the quilt.

It finished out 16 x 16 inches square.

  Originally, I started making the string blocks this spring as a way to clean up my scrapbag...a type of spring cleaning...So, I am calling this little table topper my Spring Fling Table Topper.

What have you been making out of your scrapbag? I would love to hear.

Check out what others are doing at these great Linky Parties:


Monday, June 8, 2015

Work in Progress

One of the first quilts that I ever made was a Puss in the Corner quilt. Sadly, that quilt is wore out and starting to fall apart. 

That quilt has kept us warm as we snuggled under it for many years. It's hard to give it up. So, I decided to make another like it. 

I have been working of these Puss in the Corner blocks this past week. Another work in progress.


See what others are working on at these Linky Parties:


Sunday, June 7, 2015

Sunday Scripture


An anxious heart weighs a man down,
but a kind word cheers him up.
Proverbs12:25


Friday, June 5, 2015

Mudbug Madness!

My husband and I took a road trip to Shreveport over the memorial day weekend. We went down there for the Mudbug Madness Festival. 


Oh my gosh...all the hot and spicy crawfish you can eat! And I must say that I ate my fill.


On the way home, we took our time and stopped at some resale shops and antique malls to browse.
I really liked the different ways they recycled things and made flower beds with them.
And I found these pretty fat quarters for a dollar each...I couldn't pass them up!

Also, one of the spots that caught our eye, and we had to go check it out was the Sasquatch store.


All kinds of neat things in and out of the store just for bigfoot...lol


We had a great time!